


Skill Level
Intermediate
Time to Make
1 hour

How to Make


-
BAUBLES
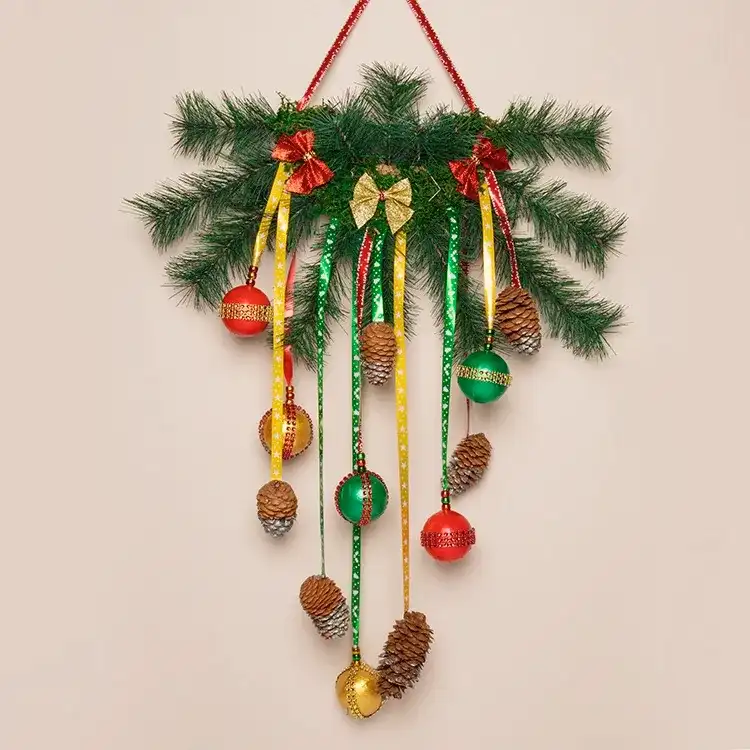
- Paint 2 baubles each in red, gold, and green, then let dry.
- Remove the hanging string, widen the hole slightly, and insert festive ribbon with hot glue.
- Add 3 metallic pony beads to the ribbon, securing with hot glue near the bauble.
- Wrap the bauble with acrylic gem ribbon, securing it with hot glue. PINE BRANCHES
- Glue artificial pine branches together by running hot glue along the stem, holding in place until dry.
- Create 2 branches with 4 pine sections, 4 with 3 sections, and 4 with 2 sections. PINE CONES:
- Paint pine cones lightly with metallic silver acrylic paint, and sprinkle with glitter while wet.
- Repeat for 5 more cones, then let them dry. THE WHOLE DECORATION
- Fold a round craft wreath in half and mark the vertical centre. Arrange the pine branches symmetrically along the curve.
- Glue the branches down and manipulate them for the best look.
- Attach ribbons, baubles, and pine cones between branches, adjusting for balance.
- Close the wreath by hot-gluing along the edges and press firmly to seal.
- Brush PVA glue on the semicircle, cover with dried moss, and repeat for the back.
- Add glitter bows, securing them with hot glue and embellishing with gem ribbon.





Share
×You can copy this link into emails, text messages or post on social media.
Share now