
Skill Level
Beginner
Time to Make
30 mins
Adult Supervision
Yes


How to Make


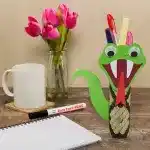
- Cut the bottom 1/3 off of a green paper plate.
- Trim a wiggly line around the dimpled edge of the plate to make the frill of the triceratops crest.
- Cut out 2 eye-holes using scissors.
- With the bottom 1/3 of the paper plate that was cut off, cut out two rounded triangle horns. Cut out a smaller rounded triangle for the horn on the triceratops' nose. Turn the pieces over onto the white sides and colour the horns in with a yellow felt tip pen.
- Cut out a beak from the paper plate if there is still some left over. If not, cut the beak from a new paper plate.
- To draw the beak shape draw a sideways oval and then draw an upside down triangle attached to the bottom of the oval.
- Cut out the shape, turn it over and colour the white back using a brown felt tip pen.
- Stick the beak to the bottom of the mask in the middle using a glue stick.
- Stick the two bigger horns either side of the triceratops' crest using a glue stick.
- Stick the smaller horn above the beak using a glue stick.
- Hole punch a hole either side of the mask.
- Cut a piece of white elastic around 38cm long (or enough to fit around the child's head).
- Tie the elastic with a double knot through both sides of the mask.


Share
×You can copy this link into emails, text messages or post on social media.
Share now