



How to Make
Step 1

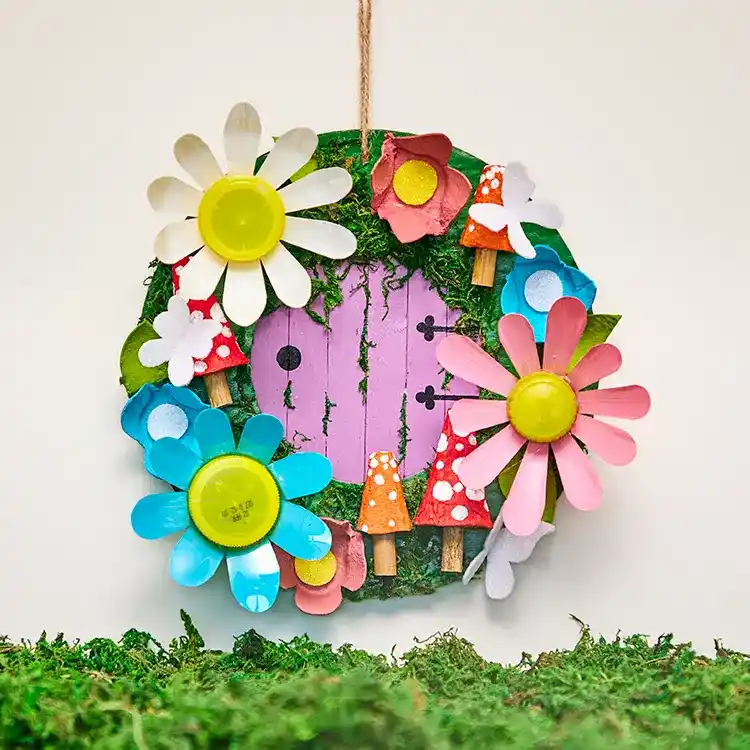
Start by painting the wreath base a dark shade of green. Then, paint six jumbo craft sticks purple. These will become your fairy door.
Step 2

Once the sticks are dry, glue them to the back of the wreath to cover the centre hole. Add finishing touches by painting on details like hinges and a door handle.
Step 3

Cut up a recycled egg box to create small flowers, mushrooms, and leaves. For the mushrooms, use the pointed peaks in various sizes and glue bamboo sticks into them for stalks. For the flowers and leaves, cut the shallow troughs into petal and leaf shapes.
Step 4

Paint your mushrooms, flowers, and leaves in bright, eye-catching colours. Don’t forget to add white spots to your mushrooms for that classic fairy garden look!
Step 5

Have an adult help make a hole halfway up a plastic bottle using a compass. Insert scissors into the hole and cut all the way around to separate the bottle into two parts. Take the end with the cap and cut narrow strips toward the neck, then bend them back to fan out the shape. Round off the edges of each strip to form long petals. Paint the underside of the flower and the petals around the bottle cap. Finish by gluing the cap into the flower’s centre.
Step 6

Use the template to cut fairy wings and flower centres from glitter felt. Now you’re ready to put it all together! Attach your flowers, mushrooms, leaves, and fairy elements to the wreath. Fill in any gaps with dried moss, then tie on some string to hang your beautiful Fairy Garden Wreath!



Share
×You can copy this link into emails, text messages or post on social media.
Share now