Skill Level
Intermediate
Time to Make
3 hours plus drying time for glue and paints
Adult Supervision Needed
Yes
How to Make
- To make the tree trunk, roll up a piece of A3 card into a tube, 5cm in diameter x 30cm in length. Tape the tube along the edge to hold the shape.
- To make the 2 tree platforms and the base, hold one end of the tube in the middle of a large paper plate then draw around the edge to make a circle. Repeat on another large plate and on a small plate, with the circles in the middles. Cut into the plates from the edges then cut out the circles to make holes. Tape up the edges of the plates.
- To make the base, push the tube through the hole in a large plate, check the tube stands up without wobbling then tape it in place. Push the small plate onto the tube for the middle section, position it 6-7cm above the base then tape it in place. Position the top plate 12cm above the middle layer then tape it in place.
- To make the tree branches, hold 2 pipe cleaners together, fold in half then twist to make a thicker piece. Repeat to make another piece in the same way then join the 2 pipe cleaner sections together by twisting the ends, making it about 20cm in length. Repeat to make 4 or 5 more branches then fix in position inside the top of the tube using a glue gun.
- Tear up some brown tissue paper. Work on one section a time, covering the trunk, branches, platforms and base with PVA then sticking the tissue down. You could use blue or green tissue to cover the middle platform. Leave to dry.
- To make the leaves for the tree, scrunch up some strips of green tissue paper, brush glue onto the ends of the branches then stick the tissue in place.
- To make the serpent, shape some Model Magic into a ball about the size of an orange. Roll it with your fingers into a long smooth shape, making it thicker at one end for the head. Leave to dry in a coiled shape then paint. Model Magic stays slightly flexible after drying so the serpent can be wrapped around the tree.
- To make the tree roots, fold and twist some pipe cleaners together in the same way as for the branches, to make shorter thicker pieces. For each root, attach 3 twisted sections together to make a longer piece. Make 7 long roots for holding the globes. For more roots around the base make a few extra pieces.
Brush glue along each root then cover with brown tissue. Leave to dry. - Twist the roots so the tissue is tightly wrapped then attach the tree using a glue gun to fix them underneath the middle platform.
- Paint 7 polystyrene balls with a layer of poster paint using different colours. Leave to dry. To make painting the balls easier, push a wooden skewer into each one so you can easily turn it round then leave to dry with the sticks in a tall jar or vase.
Lightly brush metallic paint over the balls to add more colours. Leave to dry. - Add a blob of glue onto the ends of the roots then push the balls so they are firmly attached into the holes made by the sticks. If the holes are too small, make them wider with the end of a pencil.
- Lightly brush metallic paint over the trunk, branches and roots to make the tree look more magical and to highlight the texture.
- To make the rainbow, cut a 30cm strip from a piece of white card, use oil crayons or bright felt pens to colour in the stripes. Glue one end under the top platform and the other end to the base.
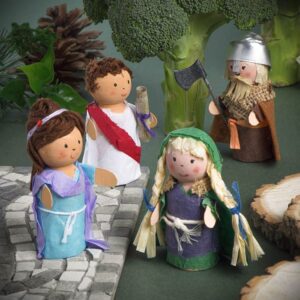
- Glue cotton wool clouds around the top platform with glitter stars. Add the snake to the middle platform. Bend the roots upwards to position the balls to represent the different worlds. Finish the model with cut out houses, trees and other characters glued onto the platforms.


Top Tip
Find out more about the different Viking worlds for other characters to include on your model. It could include cut outs of gods, animals and houses. For a group project, children can each work on a different section of the model.
Tagged with:


