
Skill Level
Intermediate
Time to Make
30 minutes + baking time for Fimo.
Adult Supervision Needed
Yes
How to Make
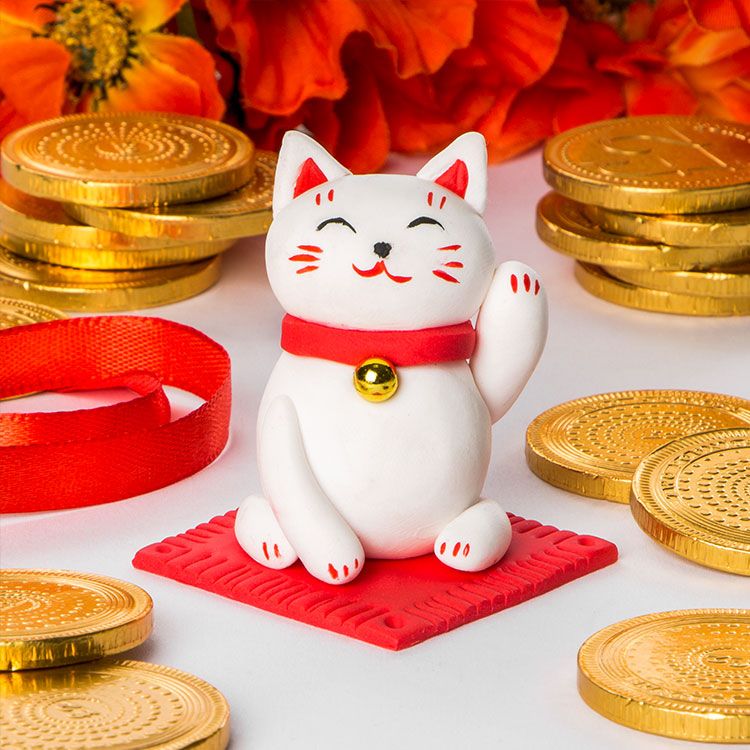
- Flatten 1 red Fimo strip to 2mm thick. Use a modelling tool or knife to cut straight edges to make a 6cm x 6cm square. Make a pattern around the edge with a tool. Save the left over red pieces ready for making the cat’s collar and the middle of the ears.
- Clean your fingers with wet wipes before handling white Fimo. Shape 3 white Fimo strips into an oval for the cat’s body and 2 strips into the head. Place the head onto the body. Try not to squash the shapes.
- Cut 2 small triangles (make the edges about 15mm long) from flattened white Fimo for the ears. Press a smaller red Fimo triangle in the middle of each ear, re-shaping if you need to so both ears match. Press the ears onto the head.
- Cut a 6cm strip x 5mm wide from the left over red Fimo. Use a cocktail stick to help position the collar around the cat’s neck, covering the join between the cat’s head and body.
- Roll 4 small Fimo pieces for the legs, 3cm in length. Roll one end of each piece to make it thinner, then press the legs onto the body, with the thicker ends for the paws.
- Push a bead into the cat’s body just underneath the collar to make a hole. Remove the bead before baking the model.
- Bake Fimo on a baking tray at 110ºC for 30 minutes. Follow all the instructions on the packet. Allow to cool before handling.
- Glue the gold bead back into the hole. Add the cat’s eyes, whiskers, mouth and details on paws using red and black paint or thin markers.


Top Tip
To paint neat, curved lines for the cat's eyes and mouth, try cutting a piece of plastic straw in half, dip it into paint, then print onto the face. Use strips of card to print the lines for whiskers and paws, or you could use thin permanent markers.