Skill Level
Beginner
Time to Make
1 hour + drying time for paint
How to Make
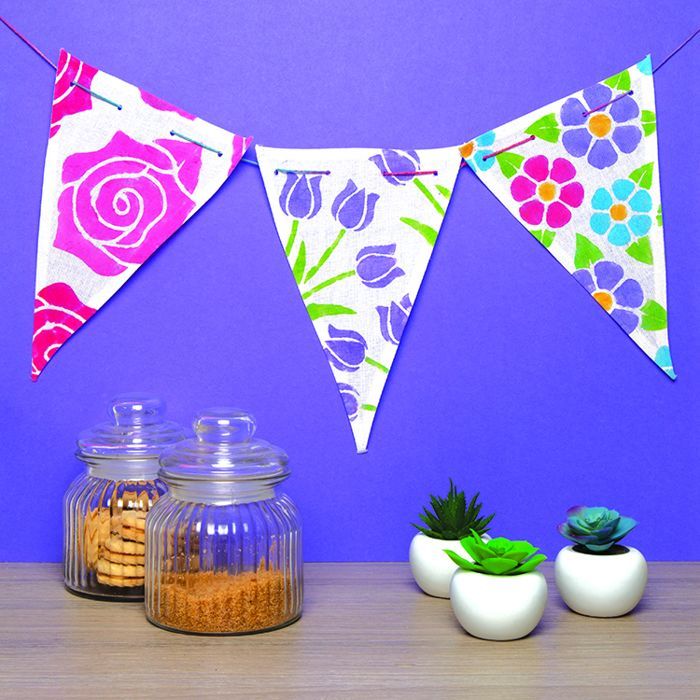
- Place a piece of canvas bunting onto some scrap paper. Place a flower stencil over the top and tape it along the edges so it doesn’t slip. If you are stencilling the design using more than one colour, decide which section to work on first, then mask off any other areas on the design with short strips of masking tape. For example, if you are working on the tulip flower first, mask off the leaves and stem so these can be stencilled separately.
- Pour some fabric paints into a mixing tray. Dip a sponge into the paint, dab it off onto scrap paper so the paint isn’t too runny, then dab it over the stencil covering the flower design. The paint will be absorbed fairly quickly into the fabric, so you should be able to carefully lift up the masking tape at the sides and remove the stencil.
- Dab the stencil on both sides with a paper towel to soak up any remaining paint then reposition it on the next area of the bunting, sticking it down again with tape. Dip the sponge into paint and dab it over the flower to make another section of the design.
- Repeat the same flower design onto more pieces of bunting while the same part of the stencil design is masked off. When you have finished stencilling the first part of the flower, peel off the tape being used to mask the rest of the design. Wipe the stencil clean then stick more tape over the flower, this time covering the area that’s just been painted. Once the stencil has been prepared, start sponging over the next part of the design with a new colour.
- Continue stencilling flowers onto the bunting using different designs with a variety of colours. Fabric paints can be mixed together to make different shades. Leave the bunting to dry for 2-3 hours, to dry thoroughly make take a day or more.
- To colour the bunting string, lightly dip 2 or 3 sponges into different coloured paints then rub the sponge along the string. Wipe the string with paper towel to remove any drips then leave it to dry before threading the bunting.


Top Tip
To keep the bunting as neat as possible, wipe the stencil regularly to avoid the paint smudging and each time you start a new piece of bunting put a clean piece of paper underneath.


