Skill Level
Beginner
Time to Make
1 hour
How to Make
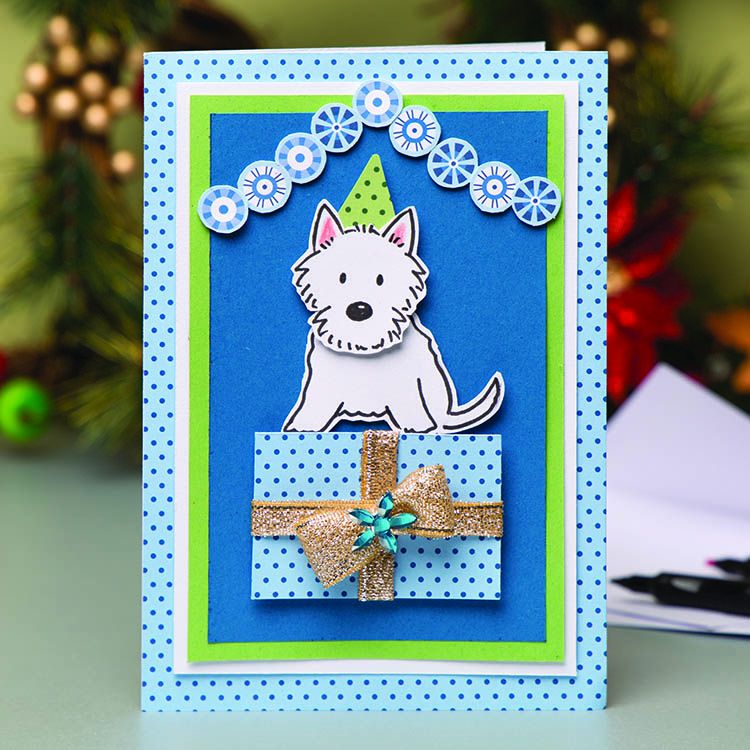
- Print off the outlines for the Westie’s head and body onto thin card, or copy it drawing the outline with black fine black pen, then add the eyes and nose. Cut around the outline, leaving a 1-2mm white border at the edge. Colour the middle of the ears pink.
- Cut a 6cm x 4cm rectangle from patterned card for the present. Cut 2 strips of gold ribbon and stick them around the present using double-sided tape. To make a neat bow, cut a 12cm strip of matching ribbon, overlap the ends and sew them together into a loop then wrap thread around the middle to pull the ribbon into a bow shape.
- For the background, stick a couple of coloured paper rectangles onto a 16cm x 22cm folded card with double-sided tape. Stick the present onto the card with the Westie’s body sitting on top.
- Cut a small triangular hat from patterned card, stick it to the back of the Westie’s head, then stick the head in position on top of the body.
- To finish the card, cut out some baubles from patterned paper then stick them along the top of the card. Add a flower or star gem onto the present.


Top Tip
To give the design more depth, use small pieces of foam tape for fixing the cut out shapes on the background so they are slightly raised up.
Template
Download


