Skill Level
Intermediate
Time to Make
1 hour
How to Make
- Cut out some skull shapes (11cm long) from white board, or you could use a colour. Use the template as a guide.
- To decorate the skulls, cut out some shapes from the patterned paper for eyes, noses and flowers. Stick them onto the skull with a glue stick. Add mouth shapes from plain coloured paper. Paint white teeth with a small brush or use a white Deco Pen. Leave to dry then punch holes at the top and bottom of each skull.
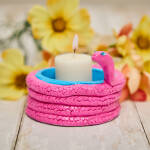
- For the flowers, place the ends of 2 crepe ribbon rolls together then fold over 5cm lengths 8-10 times. Keep the folds as even as possible so you end up with a neat stack. Carefully hold the layer together then staple twice into the middle of the stack to make a cross. Cut the ends of the ribbon.
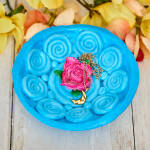
- Cut a circle from the ribbon with the staples in the middle. Separate the layers of crepe ribbon using a small pair of scissors or a flat modelling tool. Carefully pull each layer up to make a 3D flower shape. Make some more flowers in the same way.
- Thread a large needle with 80cm-100cm gold cord. Push the needle and cord through the middle of a felt ball, then tie a knot in the end so the ball doesnt slip off. Make another knot about 10cm along the cord then push the needle through a crepe flower. Leave another space, then thread a skull onto the cord, pushing the needle from the front so the cord goes along the reverse side of the skull and out of the hole at the top.
- Continue threading more skulls and flowers with felt balls on the end. You could make several short pieces or longer ones. Tie a loop at the ends to hang the decorations.
For horizontal bunting-style decorations, make in the same way with punched holes on either side of skulls.


Top Tip
Before you start threading the skulls and flowers, roughly lay them out to check the position of the different colours.